Cardboard City

Next up in our collaboration with Arielle Goddard, creator of Art Camp, is Cardboard City, an upcylcing art project that combines the wonder of creating art with play exploration and extension. Instead of tossing out spare cardboard boxes, transform them to create an imaginative play world that will support literacy, fine motor development and gross motor play!
Cardboard is one of our absolute favorite materials to work with. It is nice and light which makes it a great building material for little hands. The firm yet fluffy surface is really fun to color and paint on. We have used it to make wearable art, holiday decorations, dress up costumes, and modern sculptures… the possibilities are endless.
We are so excited to share this project with you.
The only thing better than making art is making art that you can play with!

Materials:
- Trifold presentation board
- Cardboard boxes broken down and cut into squares, rectangles, and half circles
- Tempera paint - cake and paste variety
- Paint brush
- Glue gun (for assembly… to be used by an adult)
- Oil pastels, crayons, and/or tempera sticks for texture and details
The grown-up part of this project is the prep work and the assembly. The kids get the really fun parts: building, painting, coloring, and playing! The great thing about building this on a trifold presentation board is that it folds up for easy storage when it is not in use!

1. It’s time to put on your city planner hat and start to build. This part feels a bit like piecing together a giant puzzle. Do your buildings have to be straight? No. Do you have to add an even number of windows? No. There are no rules.
For older kiddos: take a picture of their layout and ask them to piece their layout back together after they paint.
For younger kiddos: glue as you go so you can get to the paint and color part.

2. Time to paint.

3. Try adding some oil pastel, tempera sticks, or crayons to add a different texture.

4. If you are looking for more opaque paint coverage, switch from tempera cakes (which are more like watercolor) to regular tempera paint.

5. Play around with different colors and textures.

6. Once your building pieces are painted, it’s time to attach them with hot glue to your trifold backdrop!

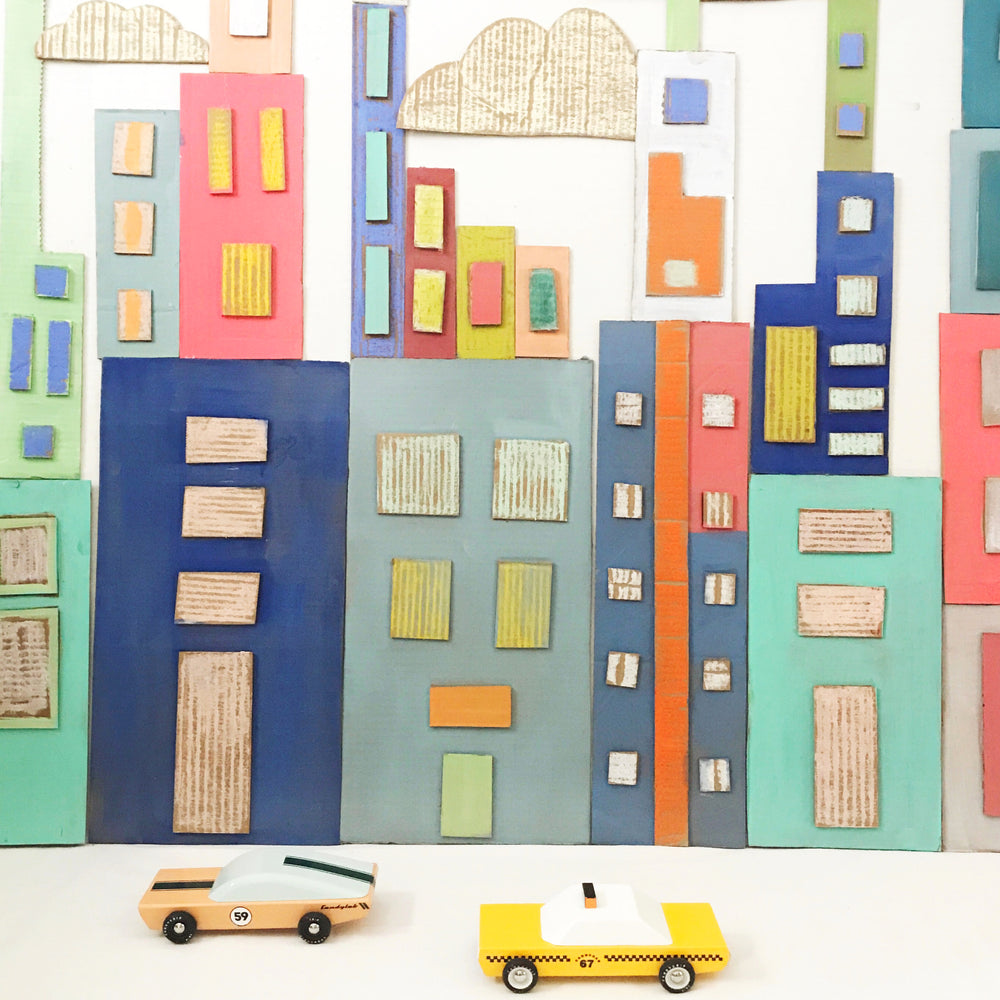
7. And now it’s time to play! Vroom. Vroom. I need a taxi!

Toys Featured: Candy Lab Retro Wooden Cars
Recent Articles
-
Playful Primer 10 Must-Have Toys for Your Next Backyard BBQ
Summer is just around the corner and we're ready for it! From backyard BBQs to neighborhood park outings, we've discovered...
read more -
Playful Primer Tips & Toys to Support Group Play Experiences
Catching a glimpse of children happily engaged in pretend play is like witnessing pure magic. Ever wonder how closely you...
read more -
Playful Primer 5 Ways to Strengthen the Bond Between Siblings
“I’ll take care of the bike. You take care of each other.” This is what I said to my children...
read more